Toll Free:
888-253-9736
Mon-Fri: 9am-5pm
Sat-Sun: Closed
Central Time CST/CDT
BackyardCity.com
Menu
Outdoor Products
Backyard Products
Structures
Structures
Shed Kits
Greenhouses
Gazebo Kits
Shade Sails
Shade Sails
Shade Sails
Custom Shade Sails
Shade Products
Shade Products
Shade Cloth
Custom Shade Panels
Retractable Shades
Awning Shades
Umbrellas
Umbrellas
Patio Umbrellas
Side-Post Umbrellas
Half Umbrellas
Umbrella Bases
Swing Sets
Swing Sets
Wood Swing Set Kits
Metal Swing Sets
Swingset Accessories
Replacement Tarps
Sandbox Covers
Swing Set Slides
Patio Furniture
Patio Furniture
Patio Furniture
Furniture Covers
Porch Swings
Artificial Fake Rocks
Outdoor Lighting
Outdoor Lighting
Patio lamps
Garden Lanterns
Solar Lighting
Outdoor Accessories
Outdoor Accessories
Garden Decor
Fire Pits
Custom Curtains
Swimming Pools
Swimming Pools
Solar Blankets
Pool Covers
Safety Covers
Blog
View Cart
Checkout
Search
Home
/
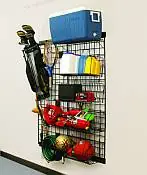
StorageTrak Shed Storage
/
StorageTrak Installation Overview
(Click to Enlarge)
StorageTrak Installation Overview
Shed Storage Solution
Last Updated: 02/26/2026 05:18 AM - ID:1109